

Today, during the girls afternoon nap and this evening, I managed to get a little project I'd been meaning to do prior to Christmas completed. I am a little at a loss as to what I should call it so I settled on a 'canvas & fabric photo display'. Nothing like just describing it!
Again, much like the double layer twirl skirt, this project began as a mental image of a finished product in my mind but with no real direction as to how I would achieve the final look!
Here's a look at the finished project so that you know what I was working towards:
 |

Oh and check out this fabric:

It is a 100% cotton canvas type decorator fabric and I just love the gold and black floral design... BUT what made me love it more was that it was marked down to $2 a meter (and its 145cm wide [57"]). I loved it so much that I bought a great big roll of the stuff (a few months ago now) and have had visions of having this fabric and colour scheme becoming a bit of a theme around the house with canvas' and cushions in the living room, drapes in the dining room and who knows what else. One thing is for sure - you will be sure to see this fabric popping up here and there in future posts - I have an ENORMOUS roll of the stuff to use!
Well enough talk, here's how I did it:
1. Choose canvas (mine was about $5 from the discount store) and apply two coats of spray paint to surface including the edges (I used gold -also bought at the discount store $3.50, to tie in with my fabric).

2. Decide how you want the fabric to lay - either horizontally or vertically; and how much of the painted canvas you want showing to determine the size of fabric strip you'll need (Remembering to allow for the fabric to have extra length to wrap around the sides to the back of the frame where you'll staple gun the fabric later). I wanted my fabric to run horizontally and to cover most of the canvas with the gold paint to serve more as a border. I also wanted to have a somewhat 'shabby' style with frayed fabric edges so I tore the fabric rather than cutting it.
 |
| Just a close up of my frayed attempt at 'shabby' style :P |
 |
| This is how I wanted the fabric to lay - I was almost tempted to end the project here as I don't mind how it looks as is! |
4. Now at this point I was still toying around with just how I was going to attach the photos to the fabric and canvas. My first thoughts were to use PVA glue in a kind of modge podge fashion but then after a little experiment with an extra photo print and fabric off cut I settled on actually sewing the photo onto the fabric. You'll need to play around with the photo placement and use a disappearing fabric pen to mark your final placement.
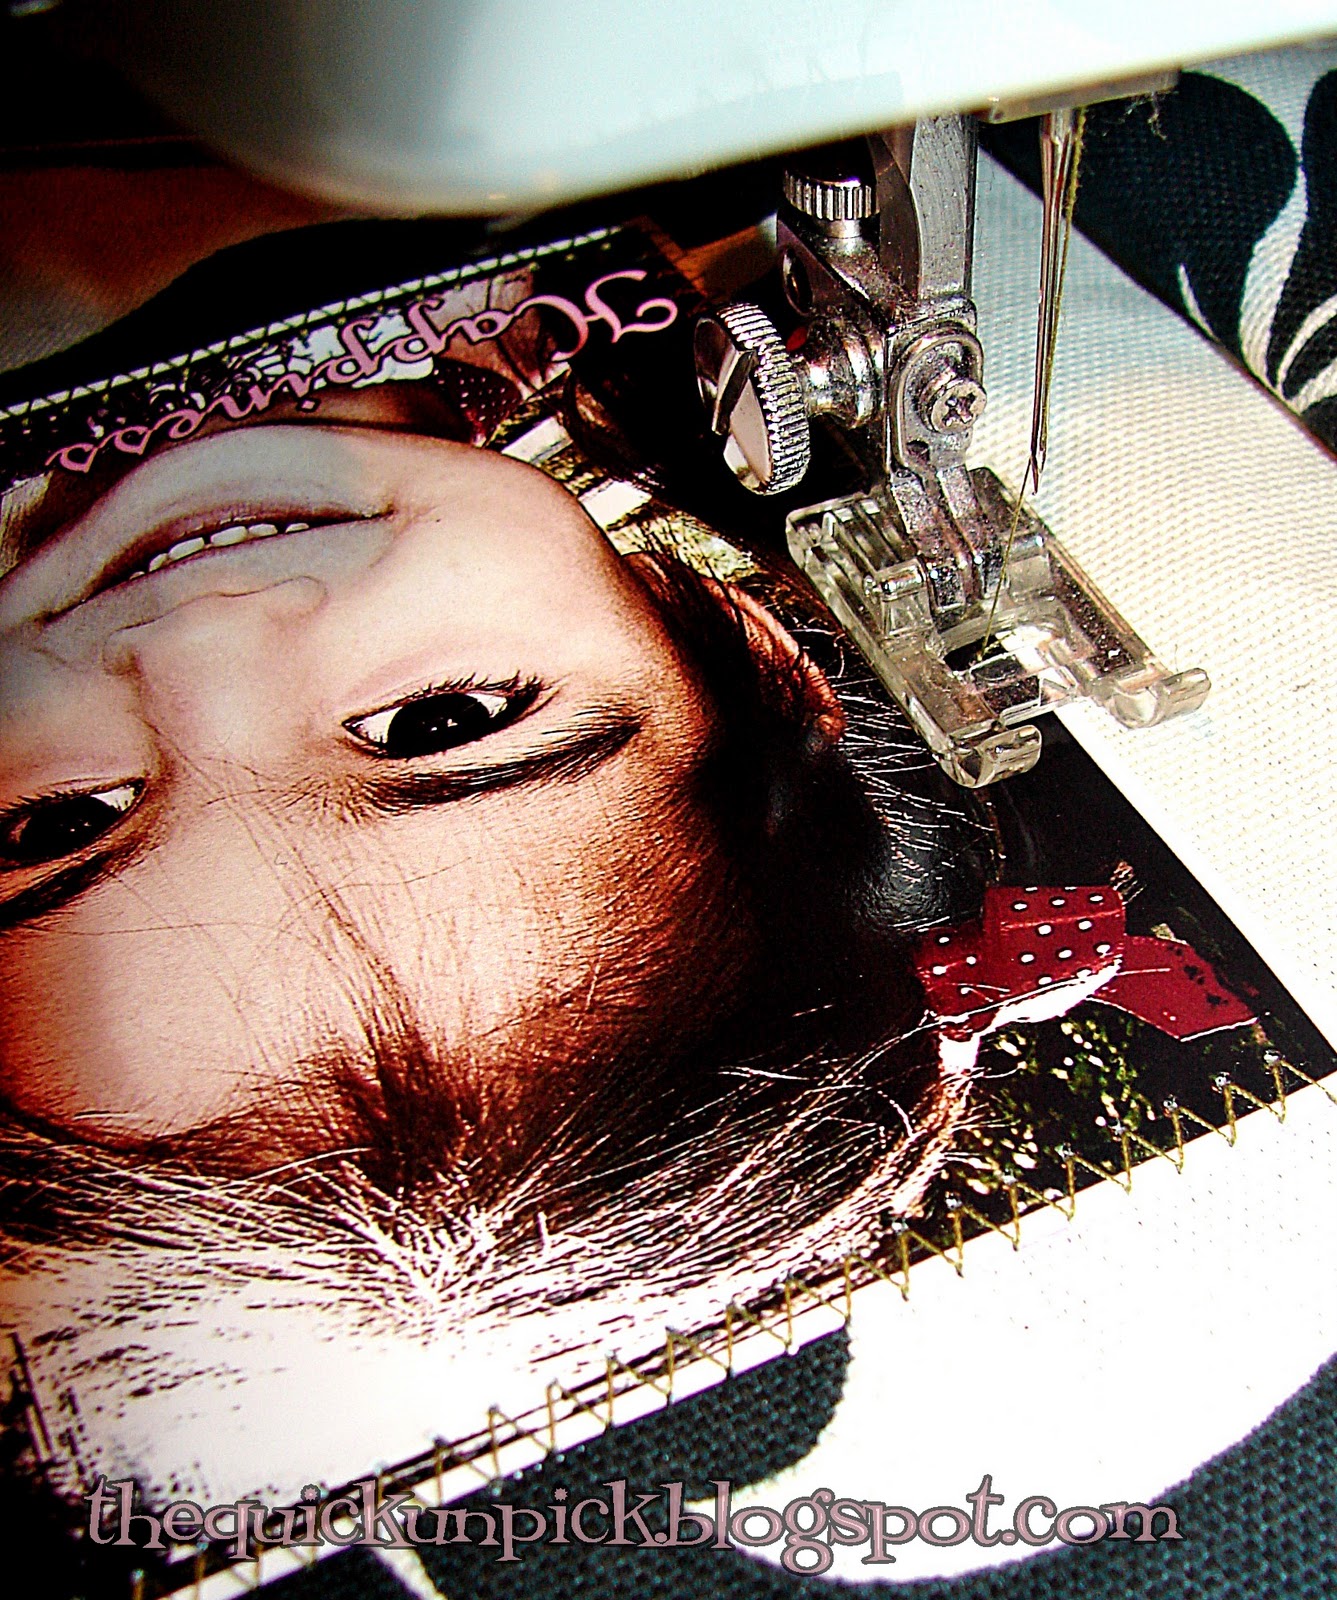
5. I did quite a few practice runs with a spare photo and fabric scrap. I tried out stitching with a sheet of baking paper over the photo to protect it - but discovered I didn't really need it, I just relaxed the presser foot by one setting. I tried a few different stitch styles - zig-zag, decorative and blanket stitch- but settled back with the zig-zag because sometimes less is more. I found it helped to just go slow with this step to ensure the photo was feeding through evenly, but otherwise this step was so easy that I'm positive I will do more projects with stitched photographs.


6. Once you have sewn all your photo's in place its just a matter of using a staple gun to stretch and hold the fabric in place.

7. Now flip it back over, admire your craftiness and WOO HOO do a little victory dance!
Now I'm actually pretty impressed with how this turned out... I feel like craftiness is contagious because since I started on this blogging endeavour I really feel more inspired and creative than ever before.
Like it? Leave a comment, become a follower or pop back again soon to see what I'm up to... but whilst you're here check out some of my other sewing/crafting tutorials. I promise at some stage to make this blog a little more organised - perhaps with tabs to sort our 'sewing' from 'craft' and 'tutorials' - but bear with me I'm still learning to get my head around HTML code and also just how to do different things on this here blog of mine!
This is gorgeous! What a cool idea to sew the photos on the fabric! Looks great!
ReplyDeleteBeautiful, beautiful, beautiful! I've never thought to do that before. I love it. Come check out some of my creations over at www.justdrinkacoke.blogspot.com
ReplyDeleteMiranda, Just Drink a Coke.
Love this idea. Never thought about sewing photos to canvas before. I am going to feature this at somedaycrafts.blogspot.com today. Grab my "featured" button.
ReplyDeleteI really like this. I have a photo that needs a mat. Might have to give this a whirl! Thanks. I saw you featured at Someday Crafts. You deserved it.
ReplyDeleteWhat a FABULOUS idea!! Thanks for linking @Creative Itch's "Sew Cute Tuesday"!
ReplyDeleteThe photos worked out really wonderfully for you. You are doing better than me in the html department...I have no idea about that area!
ReplyDeleteYou're so creative !!
ReplyDeleteI love the way you choose "Peace" for Little Little Miss M, "Love" for you and your husband, and "Happiness" for Big Little Miss M. If we read them, they become "Peace love happiness" :)
Hello, your pictures look great!! I found you in someday crafts, I hope you follow me back my blog is www.vanessajackeline.blogspot.com
ReplyDeletethis is so lovely!
ReplyDeletewould love for you to link up at our saturday linky party.
http://tosewwithlove.blogspot.com/
Thanks for linking up to Take-A-Look Tuesday at Sugar Bee Craft Edition - I featured you today! (again!) - Mandy, www.craftedition.blogspot.com
ReplyDeleteVery cool project! I would have never thought to sew the photos on. Very clever!
ReplyDeleteThank you for linking up to "Amaze Me Monday" blog party. I hope to see you next week!
What a neat project! I'll have to try it myself. Thanks for sharing!
ReplyDelete(I'm over from the Tute (Yourself) Tuesday linky party at Little Eme)
This is a terrific idea! Your picture is gorgeous!!! Tanks for being an inspiration.
ReplyDeleteWow... Loving that you all like this project... so seriously easy that you all should give it a whirl... I'd love to see anything anyone comes up with... the possibilities for variations with this are huge! (Can you tell I'm a little excited... and that I am a chronic overuser of "..." LOL) Have a top day - all you lovely ladies are making mine :)
ReplyDeleteThat is AWESOME!!!!!! LOVE LOVE LOVE IT!!!!!!! Thanks so much for linking it up to gettin' crafty on hump day! :)
ReplyDeleteLOVE it! Come link this up at Thrifty Thursdays. Happy New Year!
ReplyDeleteJohnnie
What a beautiful project! I love the fabric! Thanks for the blog visit & follow :)
ReplyDeleteHI there! I am your newest follower from the blog hop! Lovely blog:)
ReplyDeleteYou can find me at www.bouffeebambini.blogspot.com
Happy Holidays!
This is such a cute project. LOVE IT
What a great idea. Very beautiful!
ReplyDeleteI love this. Totally bookmarking it for later. Thanks for sharing!
ReplyDeleteWOW! Great job! Love the idea of the stitching around the photos. Gorgeous. Thanks for sharing on Thrilling Thursday @ Paisley Passions :)
ReplyDeleteThis is great, I am going to do a post on my blog and link back to you - thanks for sharing
ReplyDeleteI love this! Great idea!
ReplyDeleteI love this! I have been trying to come up with some new wall decorations and had seen fabric used. This idea takes it to a whole new level. good job!
ReplyDeleteThanks for stopping by my blog! I LOVE this idea!!!! I have this bookmarked and will have to come up with a place I need this! :)
ReplyDeleteThis is so pretty. What a great/creative idea to display your pics!
ReplyDeleteI LOVE LOVE LOVE this!!! I want to get brave and try it but I stink at sewing.
ReplyDeleteholy cow awesome! i'm so doing this. also, i'm your newest follower. you rock!
ReplyDeleteThank you for linking up to What I Whipped Up Wednesday! Featuring this tomorrow! :)
ReplyDeleteLove it!
ReplyDeleteSo creative...beautiful! Thanks for linking and I am going to feature this. Hope to see you again.
ReplyDelete~Gay~
This comment has been removed by a blog administrator.
ReplyDeletelarge canvas prints
ReplyDeleteI am very happy to find this blog.Thanks for creating the page! Im positive that it will be very popular. It has good and valuable content which is very rare these days.
I am very happy to find this blog.Thanks for creating the page! Im positive that it will be very popular. It has good and valuable content which is very rare these days.
ReplyDeletelarge canvas prints
To understand the heart and mind of a person, look not at what he has already achieved, but at what he aspires to.
ReplyDeletehttp://www.the-essays.com/about-us
I started in London, as a kid. My mother knew I had sort of an inbred talent. She was an actress, so I inherited it from her. But I think I got a lot of it from my grandfather, who was a great politician.
ReplyDeleteBestCustomWriting.com helps writing a college essay
The article posted was very informative and useful. You people are doing a great job. Keep going.
ReplyDeleteweb design company
This is one cool idea here. My first in seeing this kind. Really nice though.
ReplyDeleteCanvas Photos
The concept that you have introduced here was innovative. This is a good guideline for those who wish to make a canvas by sewing photos. You will get more creative ideas and tips from best custom essay writing service
ReplyDeleteI really like this. This is a terrific idea! Your picture is gorgeous!!! Tanks for being an inspiration.
ReplyDeletereally fantastic. Keep blogging.
ReplyDeletePhoto Prints Canvas
I’ve been absent for a while, but now I remember why I used to love this website. Thank you, I will try and check back more often. How frequently you update your site?
ReplyDelete야한소설
As I am looking at your writing, 온카지노 I regret being unable to do outdoor activities due to Corona 19, and I miss my old daily life. If you also miss the daily life of those days, would you please visit my site once? My site is a site where I post about photos and daily life when I was free.
ReplyDeletependik vestel klima servisi
ReplyDeletekartal mitsubishi klima servisi
ümraniye mitsubishi klima servisi
beykoz vestel klima servisi
üsküdar vestel klima servisi
beykoz bosch klima servisi
üsküdar bosch klima servisi
pendik samsung klima servisi
pendik mitsubishi klima servisi
This comment has been removed by the author.
ReplyDeleteSplash Pad
ReplyDeleteAydın Haberleri
ReplyDeleteRfid Çocuk Kulübü, güvenlik ve etkinliklerin mükemmel bir birleşimini sunan yenilikçi bir yaklaşımdır. Bu kulüp, çocukların tesislere sorunsuz erişim sağlamak için özel olarak tasarlanmış RFID teknolojisi kullanır. Her üye, kişisel RFID bileziği veya kartı sayesinde hızlı ve güvenilir giriş yapabilir. Ayrıca, bu teknoloji ebeveynlere, çocuklarının güvenliğini kolayca izleme fırsatı sunar. RFID çocuk kulübü, çocukların zengin etkinlik yelpazesi içinde eğlenmelerini sağlar, aynı zamanda ailelerin huzur içinde vakit geçirmelerini sağlar. Bu kulüp, teknolojiyi kullanarak ailelerin ve çocukların ihtiyaçlarına cevap verir, güvenlik ve eğlenceyi bir araya getirir.
ReplyDeleteTedarik Zinciri ve Lojistik Yönetiminde RFID'nin Önemi
ReplyDeleteRFID Tedarik zinciri yönetimi ve lojistik yönetimi, günümüz iş dünyasının karmaşıklığını ve büyüklüğünü göz önüne aldığımızda hayati öneme sahiptir. Ürünlerin üretim sürecinden son kullanıcıya ulaşmasına kadar olan bu karmaşık süreçler, doğru ve verimli bir şekilde yönetilmelidir. İşte bu noktada, üretim yönetimi, lojistik yönetimi ve RFID teknolojisinin kesiştiği bir nokta vardır. RFID'nin bu süreçlerdeki önemi, verimlilik, doğruluk ve izlenebilirlik gibi temel unsurları büyük ölçüde artırır.
Aydın Haberleri
ReplyDelete