I love when I find the time to bake... I've often thought that I am a better, more balanced and generally more pleasant person to be around when I've had a chance to bake or cook something special. I guess it's somewhat cathartic to be able to start with a selection of ingredients, then to combine, mix, blend and bake up a storm to create something delicious and special to share with friends and family. I do believe they (whoever 'they' are) are right when they say that cooking comes from the heart and can be an expression of love.
Here's my latest baking effort.... I give you my Frangelico Hazelnut Cake & Nutella Cheesecake Hybrid....
"Heavenly Imbibed Hazelnut Hybrid"
It is basically a Nutullea Cheesecake sandwiched between a Frangelico Hazelnut Cake that has been glazed with Nutella ganache.
Now, the separate recipes are not my own but have been tweaked a little by me and based on some gorgeous recipes that really hold their own individually... but sometimes when you can not decide between two recipes there's not much else to be done but to combine them and have both!
Here's the photo that first gave me the inspiration (compliments of my Pinterest addiction - you can follow my pinterest addiction HERE if so inclined... I love the company - let me know your email in the comments if you'd like an invite!)...
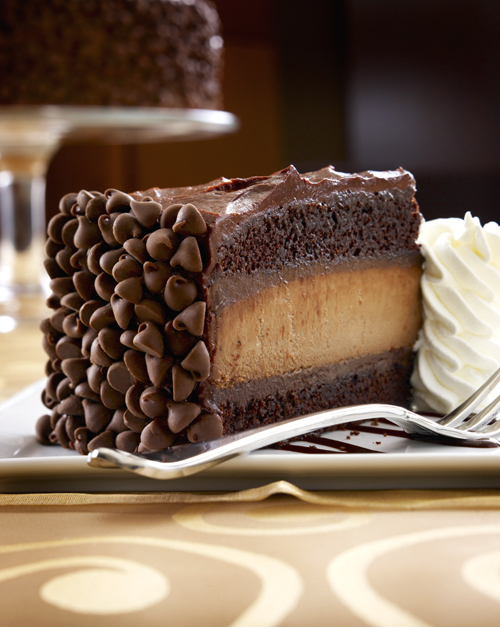
Now, I'm led to believe that the cake is a Cheesecake Factory Hershey Chocolate Bar Cheesecake. I almost instantly fell in love with the idea of combining cake and cheesecake... so began the search for a suitably decadent cake and cheesecake to replicate this little beauty!
It only seemed fitting that due to my new found obsession with Nutella that the cheesecake be a Nutella cheesecake (inspiration recipe can be found HERE at Chocolate Suze) and then it seemed to make sense that a hazelnut cake should complete the hybrid. And to cut a long story short that then reminded me of a friends love affair with the liqueur Frangelico and after a rather quick Google - because honestly "if you can't google it, it cannot be done" - I found the perfect recipe HERE. A word of warning though - after making the batter and before changing it up a little it became apparent to me that either something was missing from the recipe or the photo was in fact not a product of the recipe listed (original recipe has no cocoa yet photo clearly depicts a dark chocolate cake... trust me - the chocolate alone will never give you a cake that dark... also the pictured cake doesn't have the texture or colour variation/speckle that the addition of ground hazelnuts gives a cake)!?!
But anyhow and here's what I did... I stuck mostly with the original recipes (reduced quantities) but with a few little tweaks here and there - let me know if you give this baby a go... I'd love to see some photos too!
"Heavenly Imbibed Hazelnut Hybrid" :
THE FRANGELICO CAKE...
· 150g roasted hazelnuts (finely ground in food processor)
· 180g Self Raising flour
· 3 Tbs Cocoa
· 3 large eggs
· 225g caster sugar
· 1 level teaspoons baking powder
· 150g salted butter, melted and cooled
· 60ml milk
· 75ml Frangelico
· 95g dark chocolate, minimum 70% cocoa solids (finely ground in food processor)
Preheat the oven to 180°C/350°F/Gas Mark 4.
Line the base of a 20cm spring form cake pan with baking paper, then grease and flour base and sides lightly
In separate bowl combine flour, hazelnuts and cocoa
Using an electric mixer, beat the eggs, sugar and baking powder for about 10 minutes until very thick and mousse-like. Next, using a large metal spoon, lightly fold in the butter, milk and half of the Frangelico, followed by the nut-flour mixture. Finally, fold in the chocolate.
Pour the mixture into the prepared cake tin and bake on the middle shelf of the oven for 45-50 minutes, or until well risen and golden, or when a fine skewer pushed into the centre of the cake comes out clean. Leave in the tin for 15 minutes before turning out onto a wire rack. Discard the paper.
Using a fine skewer, carefully pierce holes all over the top of the cake, then trickle with the rest of the Frangelico.
***Now wrap the cake in plastic wrap and place into freezer whilst preparing cheesecake - this will make cutting the cake layers so much easier***
THE NUTELLA CHEESECAKE...
2 level tsp gelatine
1/4 cup boiling water
125g Marscapone Cheese
125g Cream Cheese (softened)
50g Icing Sugar
200g Nutella
1/4 cup Thickened Cream
Dissolve gelatine in boiling water and set aside to cool slightly whilst continuing.
In electric mixer, beat the cheeses and icing sugar till smooth.
Add Nutella and beat till combined then add cream and continue beating until mixture is blended and glossy.
Gradually beat in gelatin mixture and combine well.
THE CONSTRUCTION:
Remove Frangelico cake from freezer and using a suitably sharp knife cut the cake horizontally to create the two layers.
Place bottom layer of cake on serving plate and place the spring form pan without it's base around the cake. Spoon cheesecake mixture onto the base and smooth before gently placing top layer of cake on top.
Cover and place in refrigerator overnight to set.
The next day run a warm butter knife around the cake to help release and remove the spring form edges.... and yes admire your cake combination for a moment before proceeding...
TO MAKE GANACHE:
150g Nutella
150ml thickened cream
1/4 cup icing sugar
Over a low heat and stirring continuously melt nutella with cream. Once well combined allow to cool before using mixer to mix in icing sugar. Cover sides and top of cake with ganache and if desired decorate sides of cake with chocolate buttons or similar.
s
So there you have it... Enjoy... Share the love... leave me a comment - let me know what you think... Become a follower if you like (I know I like ☺) I love hearing from you all!